(This is very important)
With the addition of a mast compression post the need for a keel trunk fillet is an important feature that needs to be added to the hull.
This spreads the load from the rig thru to the hull over a greater area.
Failure to install this fillet may result in a stress crack at the forward edge of the trunk.
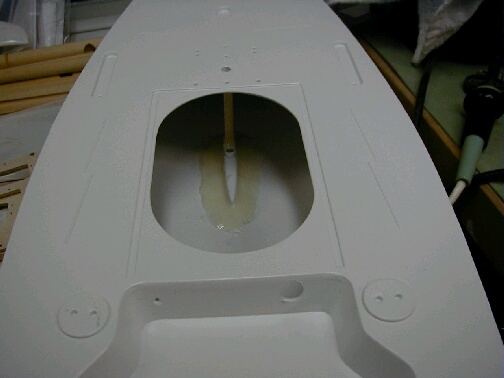
This photo is an
example of the minimum fillet I would recommend
(Keel tube has been removed for clarity)
|
Preparation
-
Clean the hull and trunk area with a solvent
(Alcohol is fine) to remove any oil.
-
Thoroughly sand the area around the trunk
and the trunk sides.
-
Remove the dust and clean the area again
with Alcohol.
-
The Keel tube and compression post should be
installed with CA.
-
Assemble and trial fit the radio board using
the modification see
Radio
Board 3/8" aft of the keel tube.
-
Mark the location of the wood cross beam,
clean and sand the marked areas.
-
Remark the radio board location again and
prepare for the epoxy.
Epoxy Operation
-
Work steadily and smoothly this must be all
done before the epoxy begins to set up.
-
Mix the West system and micro-balloons to a
thick "Peanut butter" like consistency.
-
Apply thickened epoxy to bulb fin slot then
assemble ballast and keel fin.
-
Apply thickened epoxy to the keel trunk as
shown above.
-
Apply epoxy to the locations for the cross
beams and install the radio board. smooth the epoxy to
create fillets from the beam to hull.
LET CURE OVERNIGHT
I know, your thinking "I have to do all of that,
all at the same time". Well it is a bit to do, but if you plan
what you are going to do and in the order you are going to do
it, you should not really have a problem. Work steadily and
smoothly.
Now read this again
and go over the "Instructions" #3 and 4.
Get everything ready, rehearse the steps and
lets mix some epoxy. |


